If you want to take your customer service to the next level, you need to know how to make a chatbot. Chatbots engage with your audience 24/7 and can be as simple or as complicated as you need them to be.
Don’t have coding skills? No problem! There are tools like the Messagely chatbot software that will allow you to create chatbots easily and in minutes with no required coding skills.
In this article, we’ll go through the basics, like:
- How to create a chatbot for your website
- How to create a chatbot for social media
- The best software to create chatbots without coding
By the end of the article, you’ll know exactly how to create the chatbots you need, to make sure your customer service team is as productive as it can be.
Let’s get started.
How to Quickly Create a Chatbot for Your Website
Most users want answers to their questions as soon as they engage with your website. Here’s how to create a chatbot that will guarantee an immediate answer to your website users:
Step 1. Decide the chatbot’s purpose
It may seem obvious, but a common reason for a chatbot to fail is that it was created with a purpose too broad or too undefined to be effective.
If you want your chatbot to thrive, it should be developed to fix a specific problem or aid in a specific task.
Once you’ve decided the chatbot’s purpose, meet with the team the chatbot will be aiding. If, for example, your chatbot’s purpose is to answer common customer queries, you can meet with your customer service team to show them your idea for a chatbot.
Ask them how they’d improve the language the chatbot will use and decide on the right tone to engage your users. Sketch the chatbot’s workflow so you can use it later on.
Once you know exactly what the chatbot will be doing, you can move to the next step.
Step 2. Sign up for your software of choice
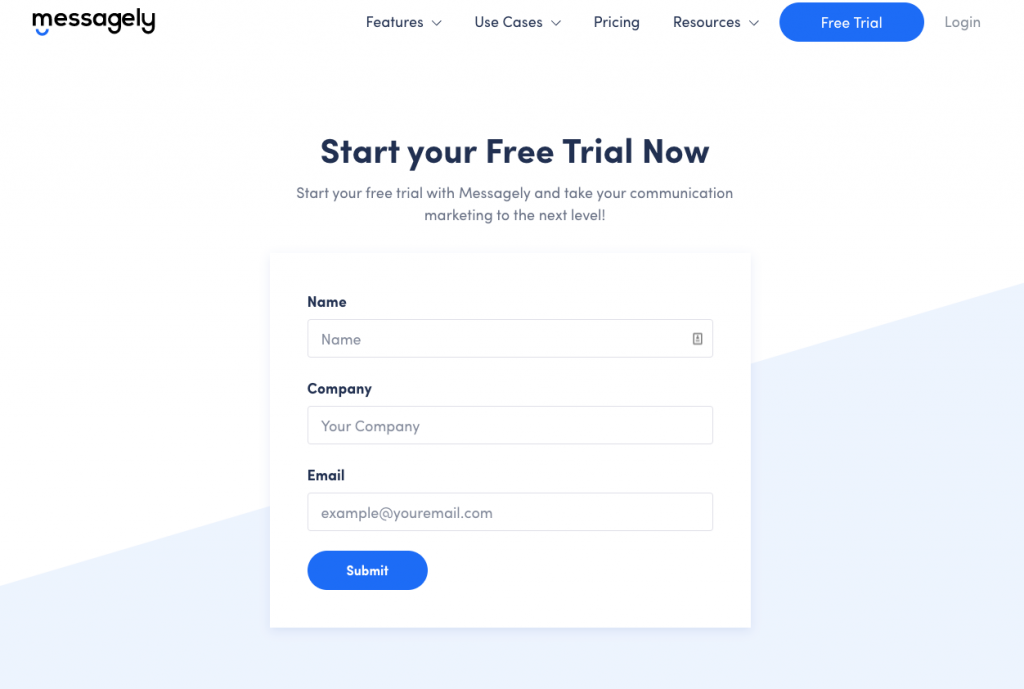
The first step of building your chatbot is signing up with the chatbot platform you’ll be using.
Luckily, most chatbot platforms offer you a free trial so you can test them out before you start paying.
Once you create your account, you’ll likely be onboarded with a simple presentation, letting you know where to find each feature and how to use the platform.
Step 3. Add JavaScript to the site
Now it’s time to make sure your website can host your chatbot. To do this, most chatbot platforms will require you to know how to add JavaScript to your website.
Doing this is very simple. Start by creating a new JavaScript file with some console.log() test code. Then, load that file using a script tag in your HTML with some basic HTML codes. Finally, save your changes and use your Developer Tools to ensure you’ve loaded your JavaScript file correctly.
You can find an in-depth explanation of how to add JavaScript to your website here.
Step 4. Get familiar with your chatbot’s platform
The next step is getting to know your chatbot builder. Most platforms make it very easy to understand how to create a chatbot, so novice users can get started quickly.
Start by locating the chatbot creator. Once you’ve located it, go through the steps. Most follow the same structure of creating a workflow, choosing the channel, defining the targeting, and programming when the chatbot will launch.
Although some steps may change their order or name, it’s all based on the same principle: workflows.
Explore the platform so you’re familiar with it before you get started.
Step 5: Set up your automations
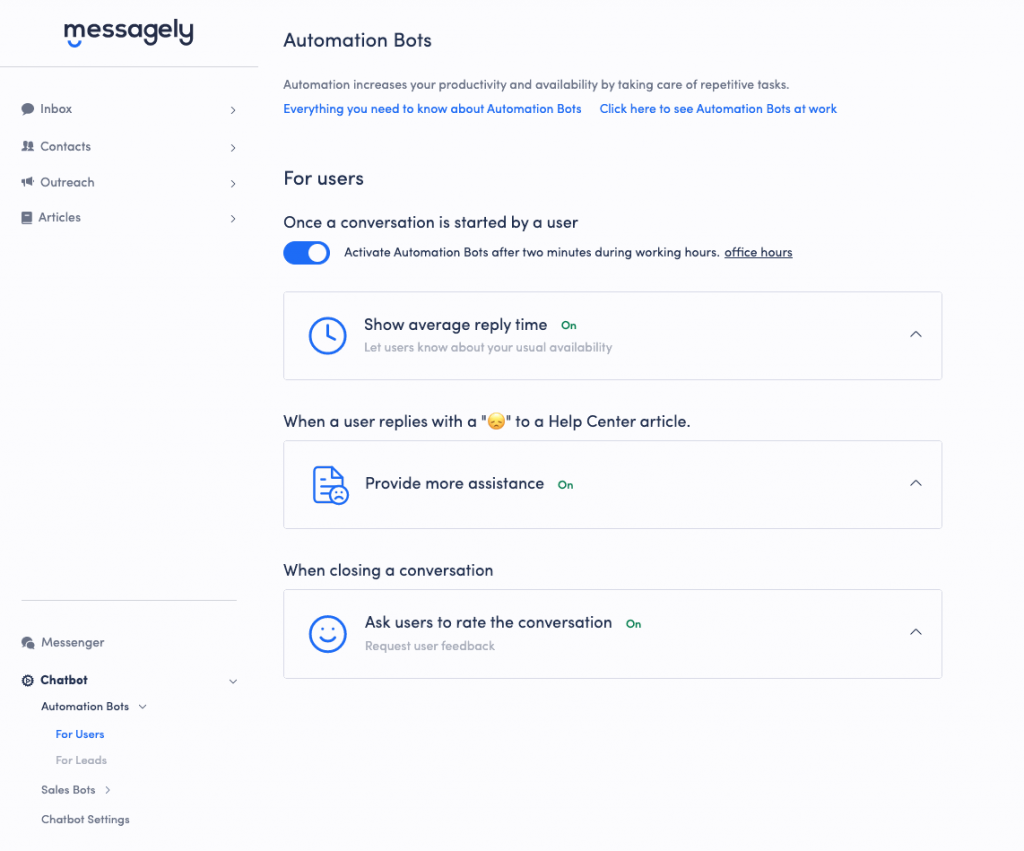
Before creating your chatbot, you should set up the basic automations for how your live chat will behave and create simple triggers. This is especially important with your website chatbot because it automatically tells your users valuable information before they even engage with your chatbot.
With Messagely, you can set up your live chat to show the average reply time, ask users to rate a conversation when it’s over, and provide more assistance to users that responded negatively to a Knowledge Base article.
This is optional and not required in every platform, but it helps both your live rep teams and your chatbots act as soon as your user needs them.
Step 6: Create your chatbot
Now that you’ve set up the basics, it’s time to get to work and start creating your chatbot.
Define your chatbot behavior
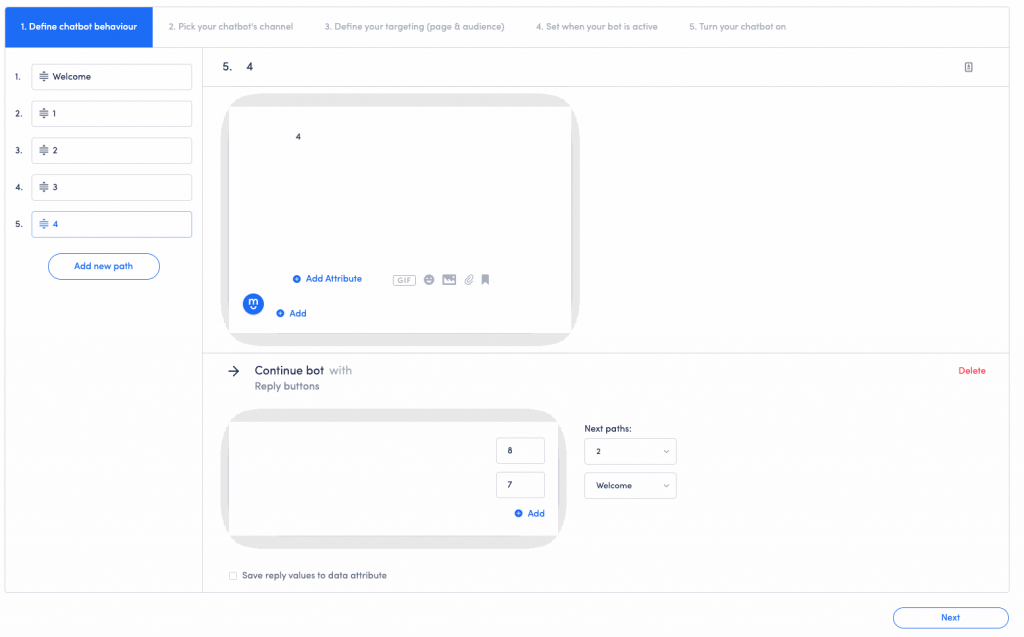
The next step is the process of creating your chatbot’s workflow. Start with a simple welcome message and add a few reply buttons so your audience can interact with your chatbot. These reply buttons should follow your common user questions, like “I want more info about X” or “I need help with X.” Think of the buttons as paths. Once the user has selected a direction, keep developing the path until a response has been reached.
For example, you can start with a welcome message then ask if the user needs help with your products or if they want to learn more. If the user clicks on “need help,” you can then show them a few options for selecting the topic they’re interested in, and once you know what they need help with, you can connect their query to an article with your Knowledge Base.
Remember to always keep your chatbot as friendly and useful as possible while giving your users the option to contact a live rep immediately. This will prevent your users from getting frustrated with your chatbot. Instead, they will use it as an optional tool.
Decide on chatbot’s channels
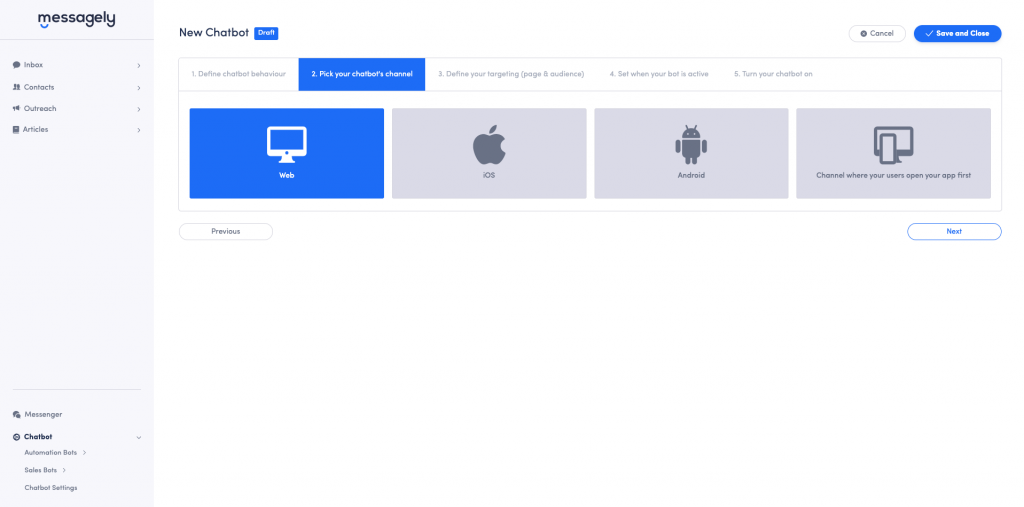
When you’re satisfied with the number of paths you’ve created within your workflow, you can select where you’ll want your chatbot to appear.
Although you’re currently building a chatbot for your website, a good chatbot platform will allow you to use the same chatbot for multiple channels. That way, you don’t have to repeat the process of creating the same chatbot for multiple platforms.
Define targeting
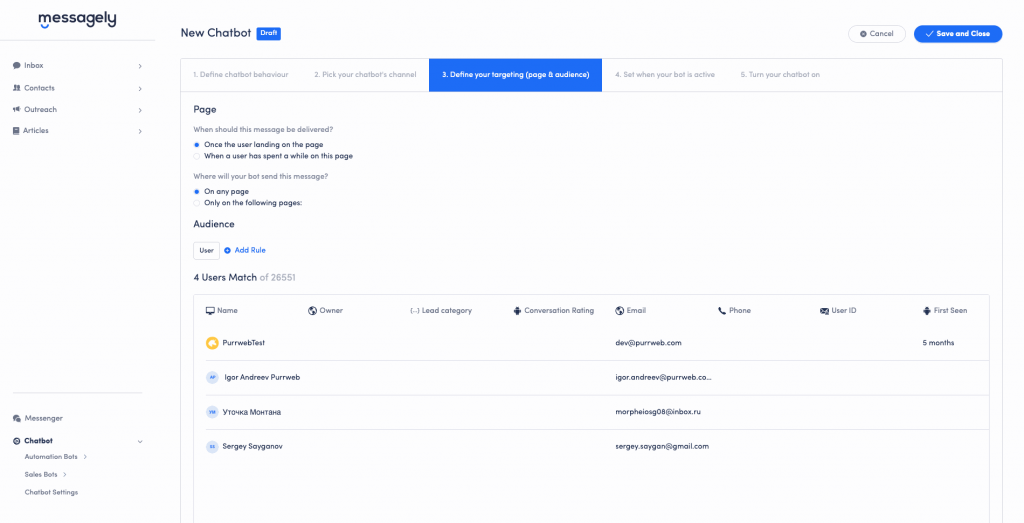
Next, you’ll have to define targeting to figure out when your chatbot will engage with your audience and on which pages.
This allows you to create separate chatbot behaviors based on customer behavior. For example, if your users typically go to your home page, then to your features page, then to your pricing page, and then make a purchase, you can establish rules that can allow your chatbot to nurture your leads by engaging with them as they go to the pricing page. With this process, you can engage with them at the most critical point of their customer journey, solving their issues and increasing conversion rates.
Make sure to always set up these targeting options through data-driven decisions. That way, you can ensure you’re acting on actual user behavior.
Set activity time
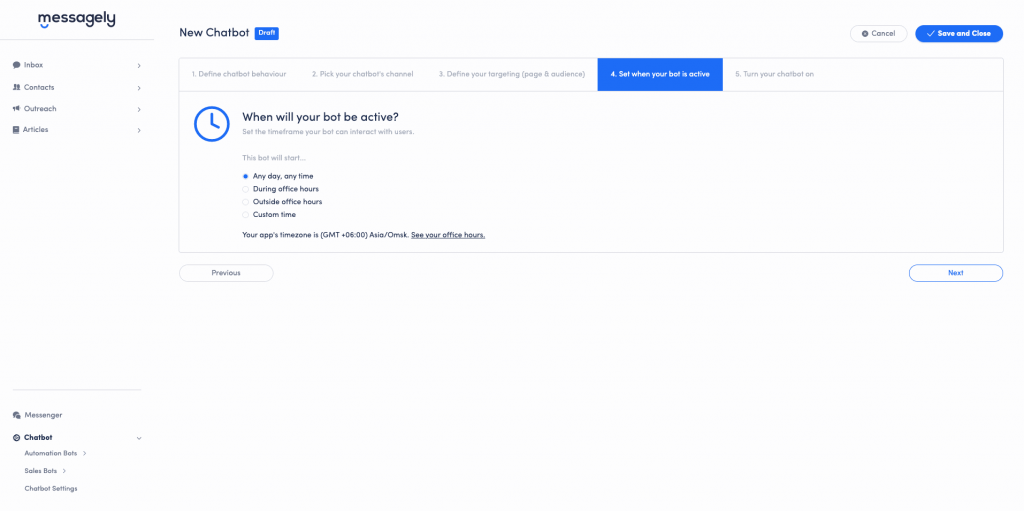
The next step is to set up the times your chatbot will be active. Although most people will want a chatbot that works around the clock, there are some chatbots that you’ll want to operate within working hours and others outside working hours.
For example, if you’re developing a chatbot for meetings, you’ll likely want that chatbot to work any day, any time so users can schedule meetings 24/7 with your sales teams.
If you’re developing a sales chatbot that qualifies leads and routes them to the best sales rep, you’ll want that chatbot to work only within office hours, so the lead can be routed to a live agent.
Finally, if you’re developing a comprehensive customer service chatbot to help users when your live agents are away, you’ll want that chatbot to work outside office hours.
You can even set up a custom time for limited promotions and specific temporary user needs, like crisis management or special events.
Step 7: Activate Chatbot
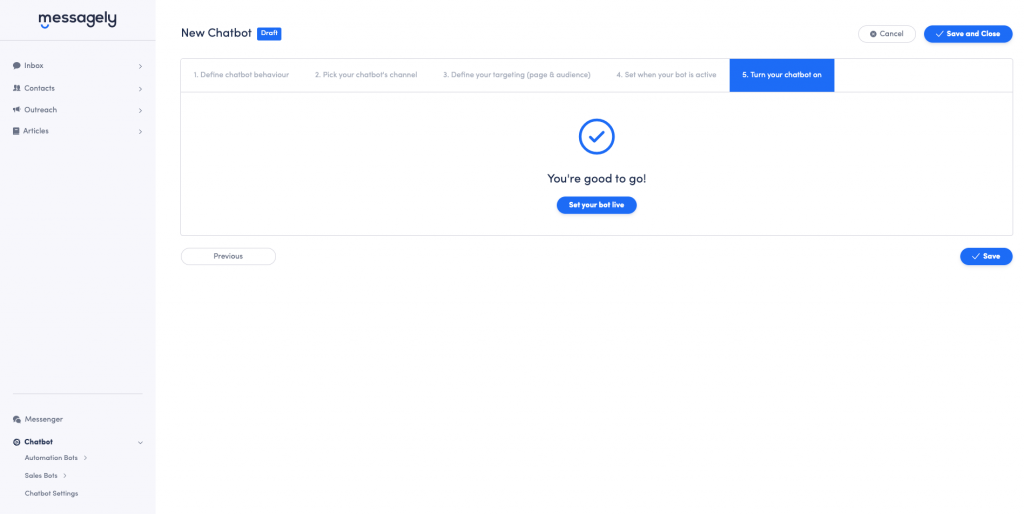
You may want to get your chatbot working right away. However, the more complex the chatbot, the more tests you’ll want to do before deploying it.
A simple chatbot that answers the three main questions your users ask can usually be developed and deployed within minutes. More complex bots used to qualify and route leads will need testing and approval from all stakeholders.
To make sure your chatbot is ready to be deployed, go through each path in the workflow as a user would, and make sure each step perfectly leads to the next one. Then, get it reviewed by your coworkers, especially if they work in the area the chatbot will be deployed. They’ll likely have valuable ideas and suggestions for the chatbot.
Once it’s been reviewed and approved, you can deploy it and set your bot live.
Step 8: Test, test, test!
Remember: your job isn’t done just because your chatbot is live. If you want to make sure your chatbot will thrive, you need to keep an eye on it, especially in the first few weeks.
Look through your analytics to see where people drop off and when people are more likely to engage with your chatbot. Compare your current state to before the chatbot was deployed. Are users still asking the same questions? How often are they connecting with live agents? Which user queries is the chatbot failing to properly answer?
There’s no such thing as a perfect chatbot, but with enough testing and improvement, you can get as close as possible to it.
Creating WhatsApp & Facebook Messenger Chatbots
Some companies may want to develop chatbots for WhatsApp and Facebook Messenger due to their presence on those platforms. This usually happens when the Facebook page of a company is more active than their website, or when they need to properly manage WhatsApp messages from multiple users.
Here’s how to make a bot for those platforms:
How to Make a Whatsapp Bot
WhatsApp bots are great for handling a large number of conversations in a company’s WhatsApp number. Here’s how to create a WhatsApp bot in-app:
Step 1. Apply for the WhatsApp Business API
If you want to create a WhatsApp bot in-app, you’ll have to apply for the WhatsApp Business API. The API allows multiple programmers and developers to set up a bot for medium and large companies through basic coding.
To apply, you’ll need to give WhatsApp your company name and URL as well as some of the information of the company representative that’s asking for access to the API.
Step 2. Design your chatbot’s flow
Once you get access to the WhatsApp Business API, you’ll need to design the flow of your WhatsApp chatbot.
To do this, think about the purpose of the chatbot and how the conversation would typically go with a live rep. You can use the help of your rep teams to get input on common customer behaviors as well as the answers that work best.
Keep in mind that you’ll also need to tell your chatbot how to react to questions it can’t answer, like linking to a knowledge base or connecting to a live rep.
Step 3. Choose a chatbot platform and a database to host your chatbot
Once you have an idea of how your chatbot will work and what it will be used for, you’ll want to use a chatbot maker to help you create the chatbot.
Although you can create chatbots for WhatsApp from scratch, chatbot platforms allow you to create chatbots without coding and even give you templates to use for free.
They also host your chatbot, guaranteeing your chatbot will be up and running for as long as you pay.
Step 4. Test and improve
Once you’ve created your chatbot, you’ll want to keep a close eye on how it behaves and how well it works.
Make sure whatever chatbot platform you’re using allows you to access analytics to track your chatbot’s health, and use customer feedback to improve your chatbot’s performance and behavior.
How to Make a Facebook Messenger Bot
Facebook Messenger bots help users and marketers engage with their social media audience, and they’re a great way to automate responses to multiple users.
Here’s how to make a Facebook Messenger chatbot:
Step 1. Decide how you want to create your Facebook Messenger chatbot
You can create your Messenger chatbot through a chatbot platform or through Facebook itself. Although a chatbot platform may make things easier for you with free templates and simple editors, lately, Facebook has been improving its API to make it friendlier and simpler to use.
Given that Facebook’s API is free to use, it may pay off to learn enough to use the API instead of paying a company month to month for the use of a Messenger chatbot.
Step 2. Design your chatbot’s flow
Once you’ve decided how you’ll create your chatbot, you’ll need to design its flow. Start by establishing the chatbot’s purpose. Then sketch how the conversation would typically go with a live rep.
This is a perfect time to include the team of live reps that the chatbot will be aiding since their input will be extremely valuable to establish customer behaviors and common effective answers.
Keep in mind that you’ll also need to tell your chatbot how to react to questions it can’t answer, like linking to a knowledge base or connecting to a live rep.
Step 3. Develop your chatbot
Once you have an idea of how your chatbot will work and what it’ll be used for, you’ll want to start developing it.
If you’ve chosen to develop it through a chatbot platform, you’ll usually get access to free templates and drag-and-drop editors to make it easy to develop the chatbot. These platforms also host your chatbots and save backups in case of any accidents, so you don’t need to worry about losing your chatbot.
When you’re done developing the chatbot, make sure you go through each path as a user before deploying it, and bring in other coworkers to get feedback on where and how to improve your chatbot.
Once you’ve collected and implemented as much feedback as you can, it’s time to deploy your chatbot.
Step 4. Test and improve
Once you’ve created your Messenger chatbot, you’ll want to keep a close eye on how it behaves and how well it works.
Make sure whatever chatbot platform you’re using allows you to access analytics to track your chatbot’s health, and use customer feedback to improve your chatbot’s performance and behavior.
Conclusion
In this world of automations and immediate responses, chatbots aren’t a luxury, they’re a necessity. If you want to create a chatbot the easy way, head to our chatbot software and get started right now!




 Instagram